Introduction
TaskSuite has integrated with Microsoft to allow for OAuth2.0 authentication to take place on inbound mail servers. The set up requires some configuration by the client on their Azure Portal: https://portal.azure.com/#home
Azure Portal Set Up
The set up consist of a number of steps to grant TaskSuite exclusive access to the target mail box. Follow the steps below to obtain the required information to allow TaskSuite to authenticate with your desired mailbox.
Make sure you log in with the account that you wish to allow TaskSuite access on.
Step 1: Register an application
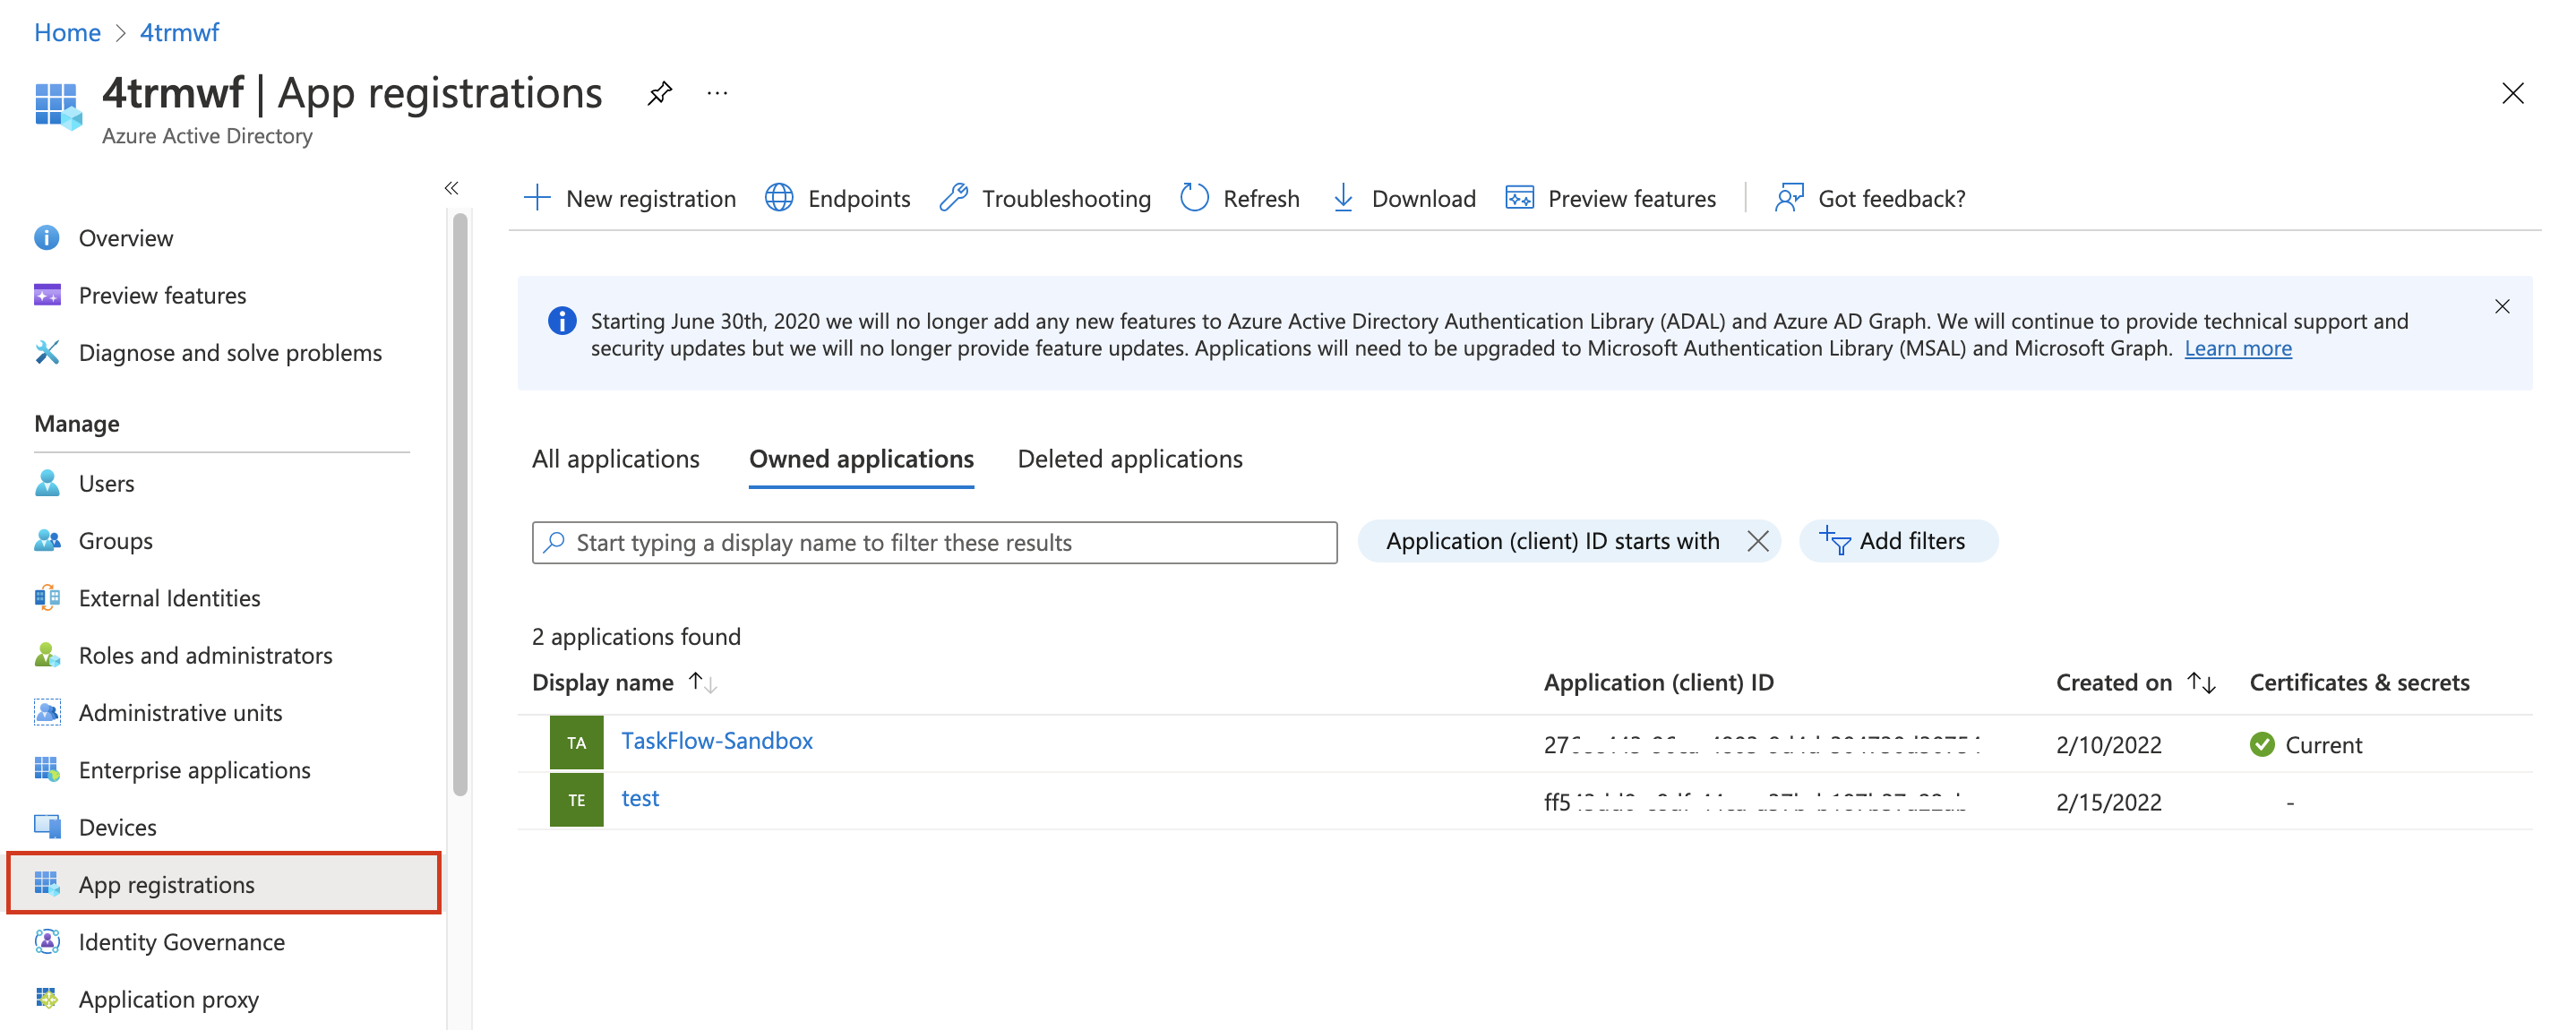
Navigate to your Azure portal by clicking on the link provided above and logging in to your portal. Once you have successfully logged in you can navigate to the Azure Active Directory. You can then register a new application on Azure Active Directory by clicking on “App Registrations” as seen in the screenshot below:
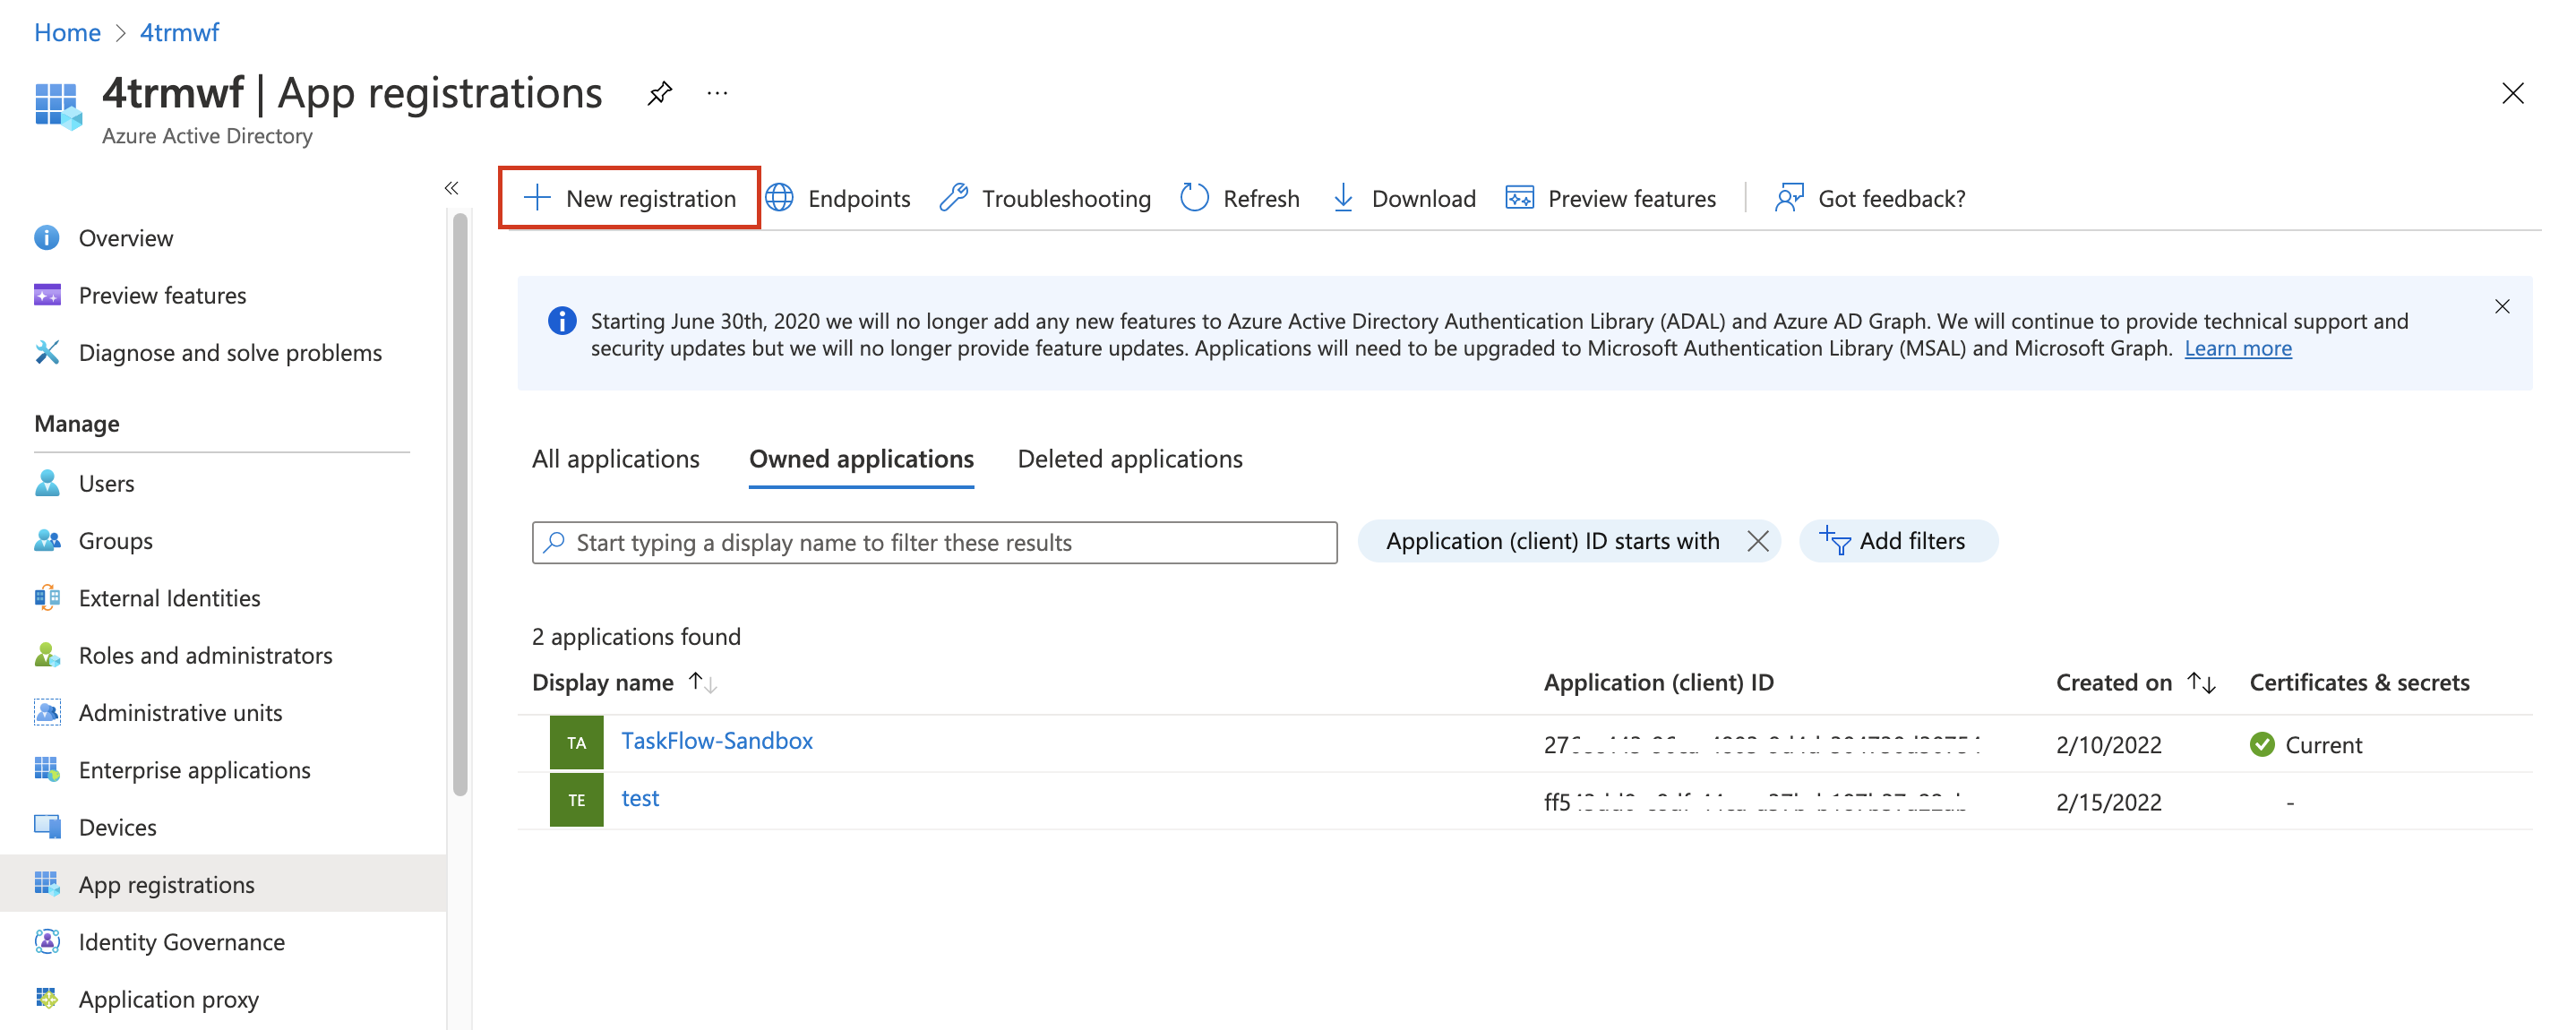
Click on the “New Registration” option located towards the top left of the screen as seen in the screenshot below:
The following fields should be populated:
Name: The unique name used to identify the TaskSuite application. (Suggestion: TaskSuite-Mail)
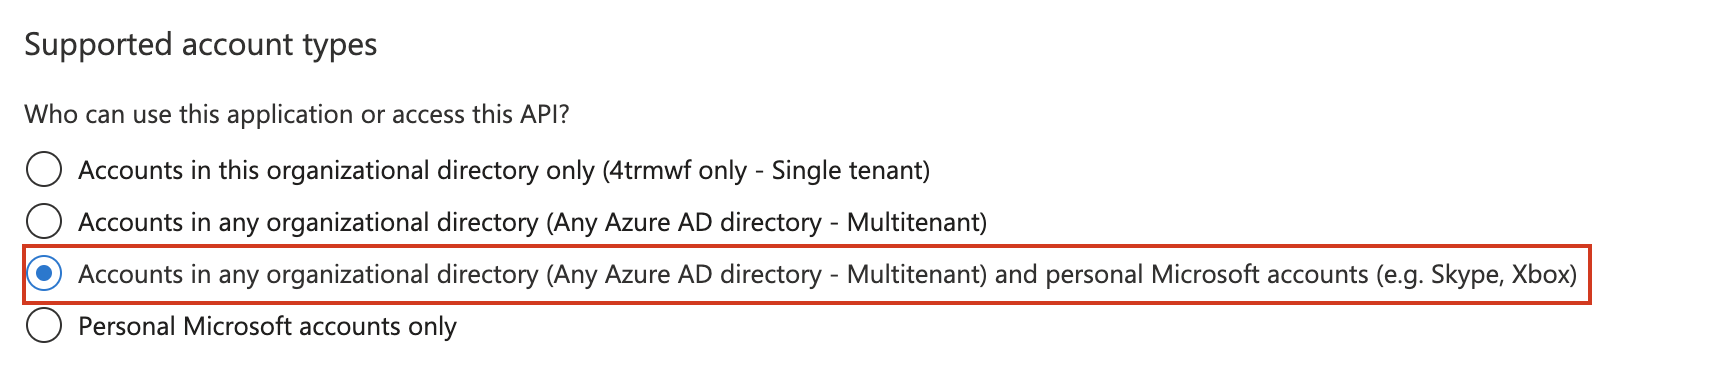
Supported Account Types: Select the “multi tenant” option
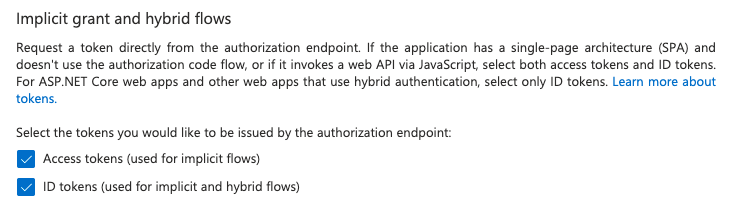
Ensure that you tick both checkboxes below to allow TaskSuite to retrieve the access tokens
Redirect URI: can be omitted for now and will be set up at a later stage (Step 4)
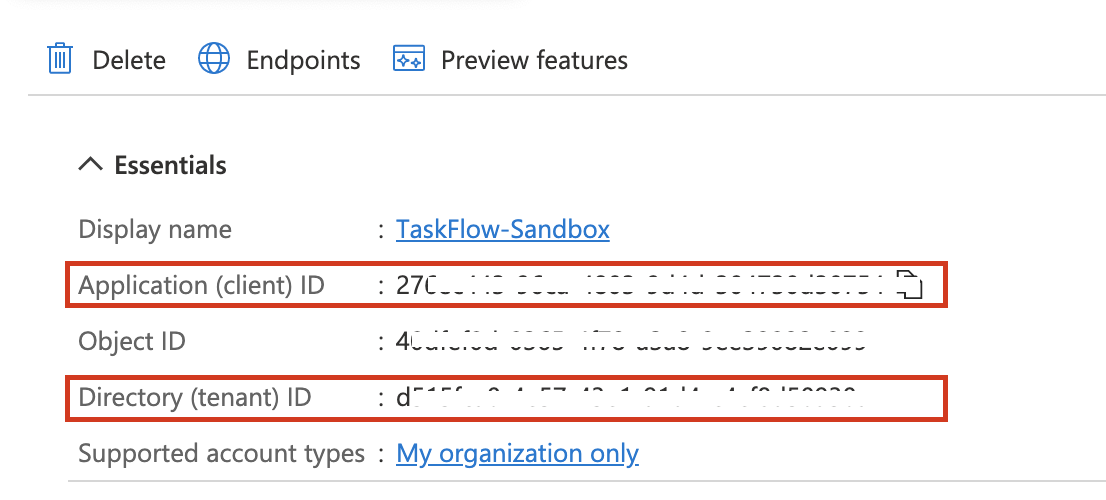
Click the “Save” option and take note of the information displayed on the screen once the record has been saved. The important fields are “Application (client) ID” and “Directory (tenant) ID” as this will be required to set up the account in TaskSuite.
Step 2: Set up a secret
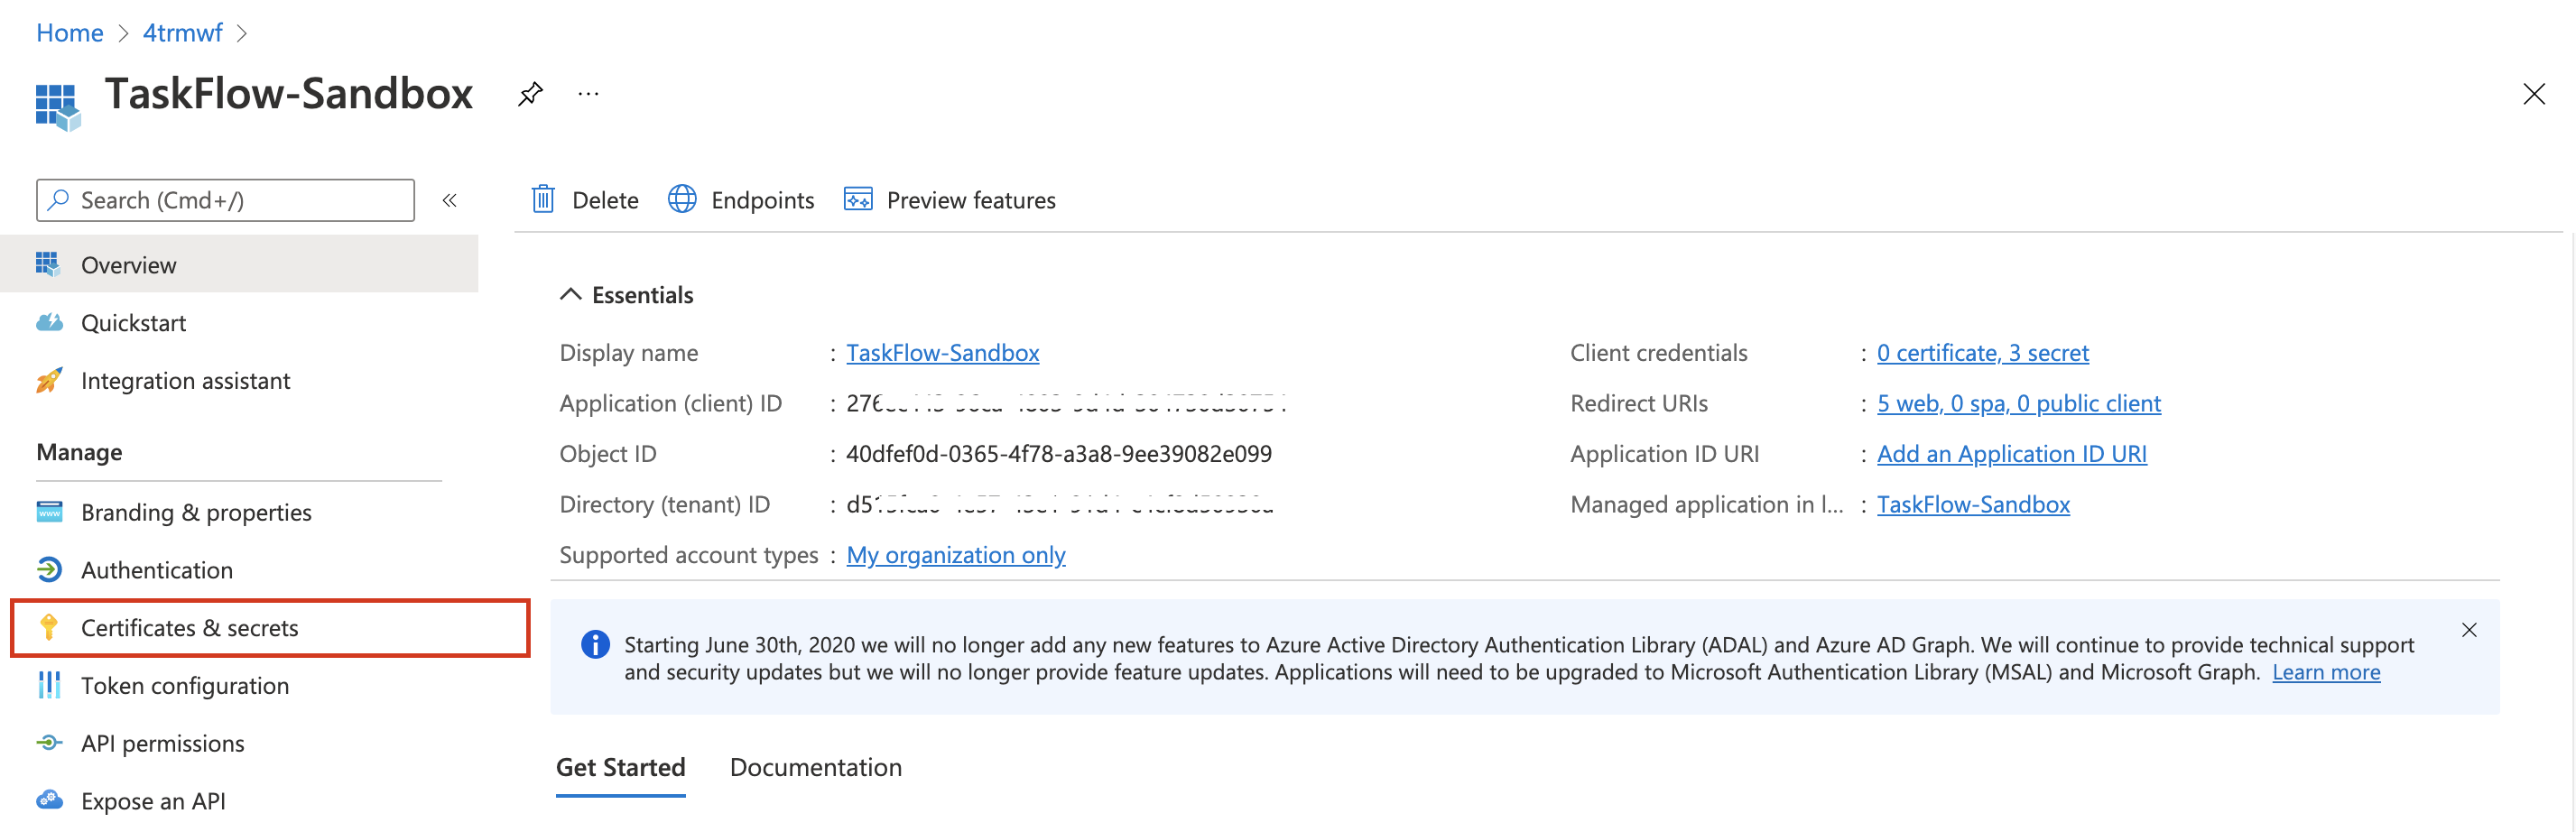
The next step is to set up a secret for your newly registered application. To do this you will need to click on the newly registered application and navigate to the “Certificates & Secrets” menu as seen in the screenshot below:
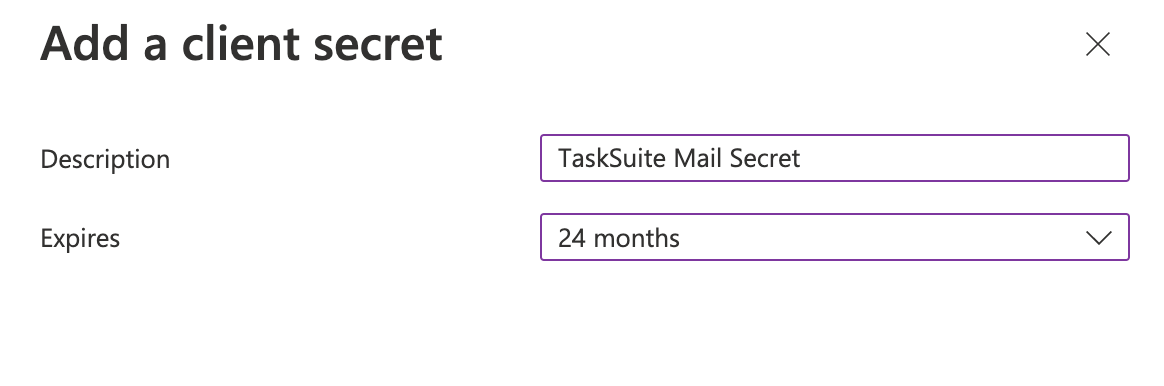
Click on the “New Client Secret” button located towards the top left of the list view to create a new secret. The following information will need to be populated:
Description: A unique name to identify your secret
Expires: How long the secret should last before you would need to update it. TaskSuite suggests 12 to 24 months as this password would need to be changed manually by your manager.
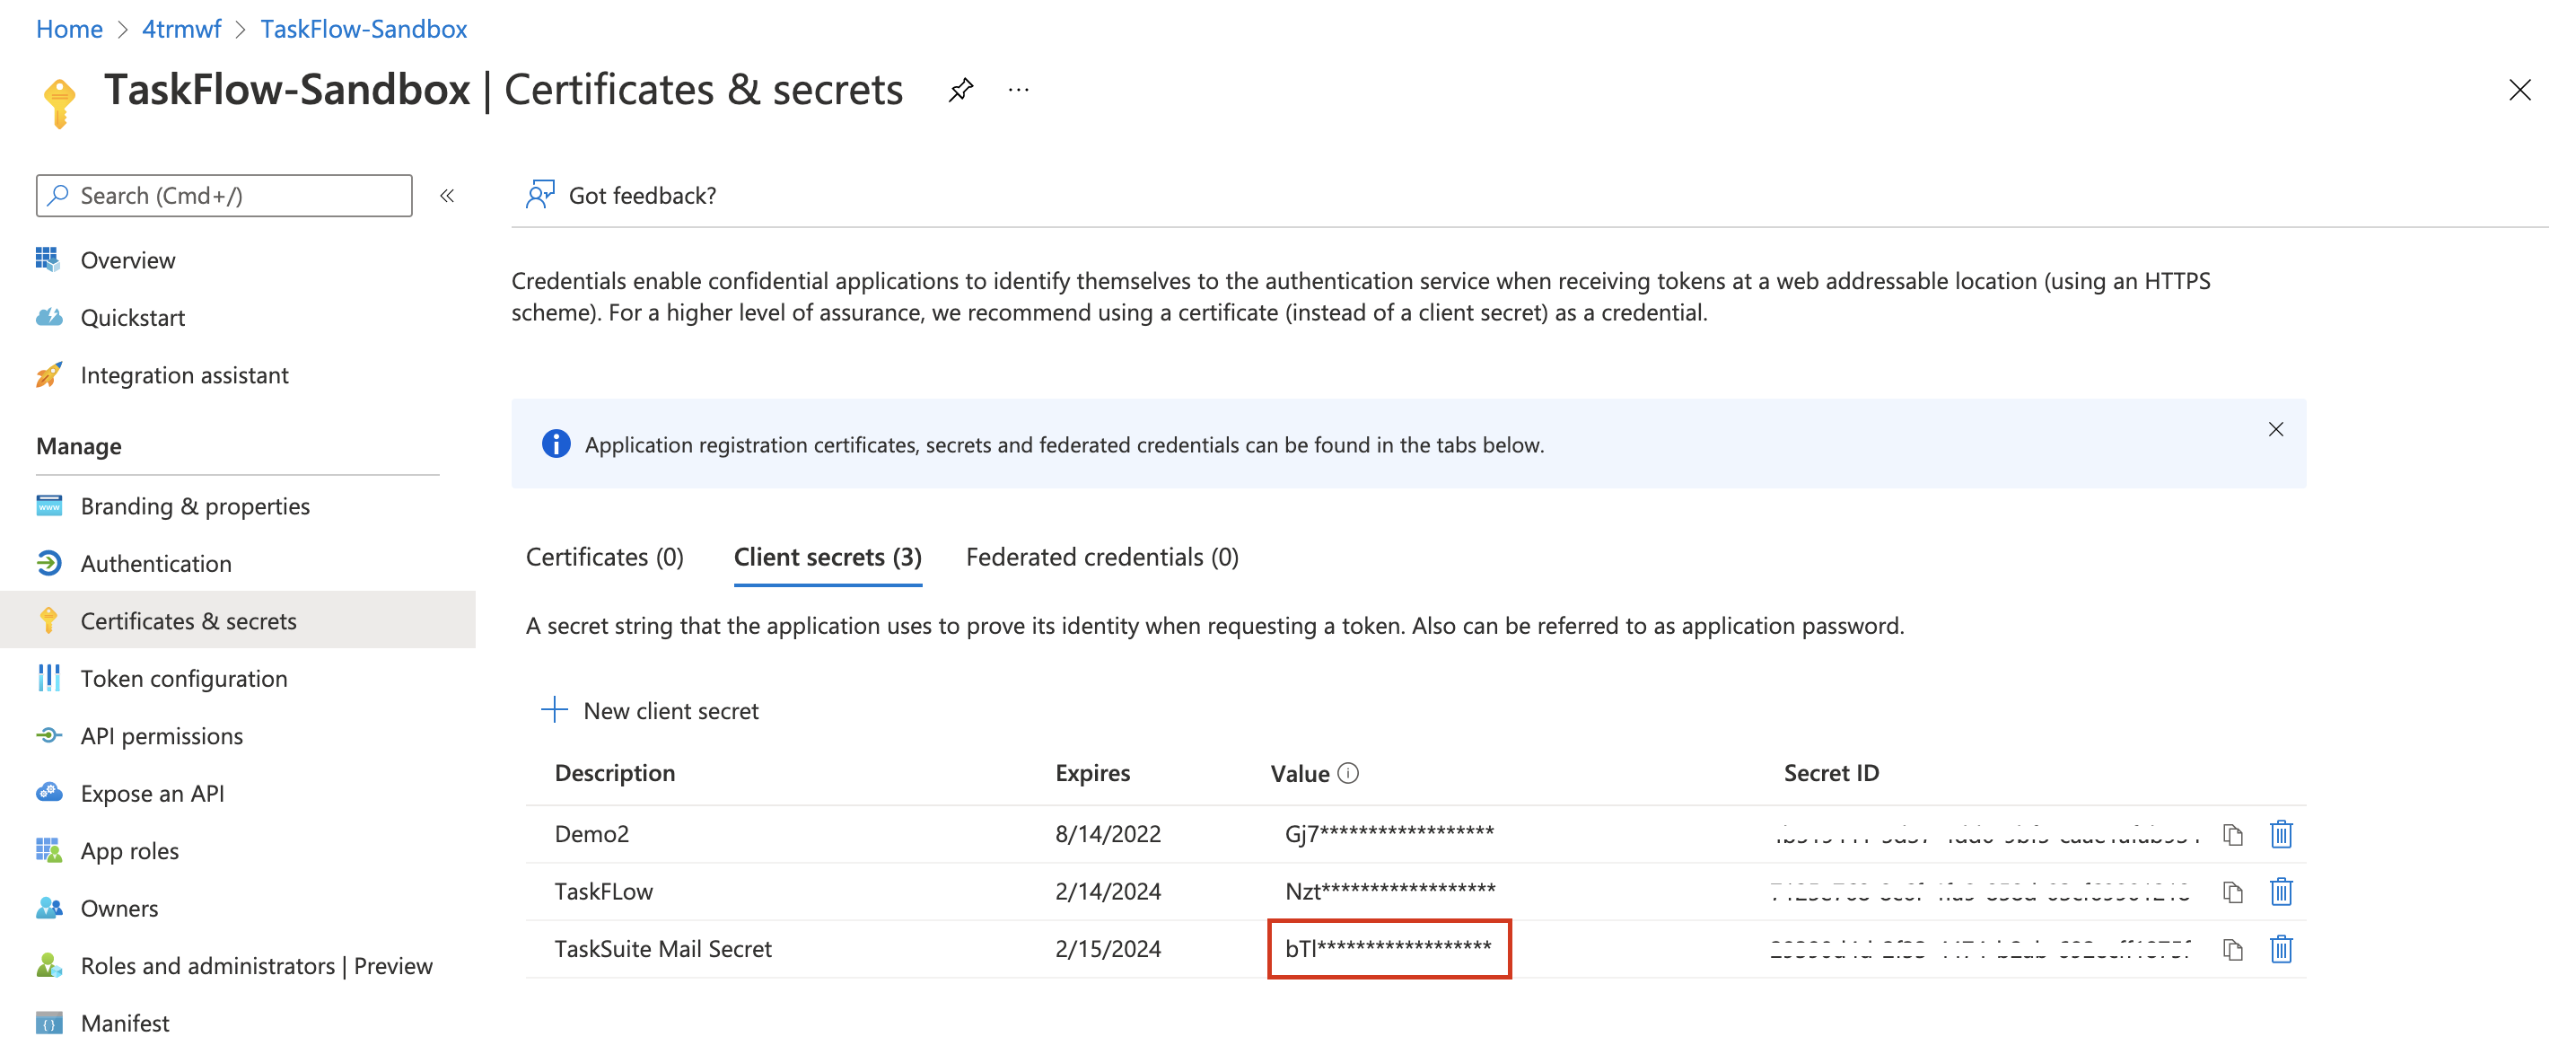
Once you click “Add” you will be presented with a list of secrets that have been created on your Azure Active Directory. Make sure you copy the “Value” section of your newly created secret to be used with the TaskSuite inbound account set up as seen in the screenshot below:
Step 3: API Permissions
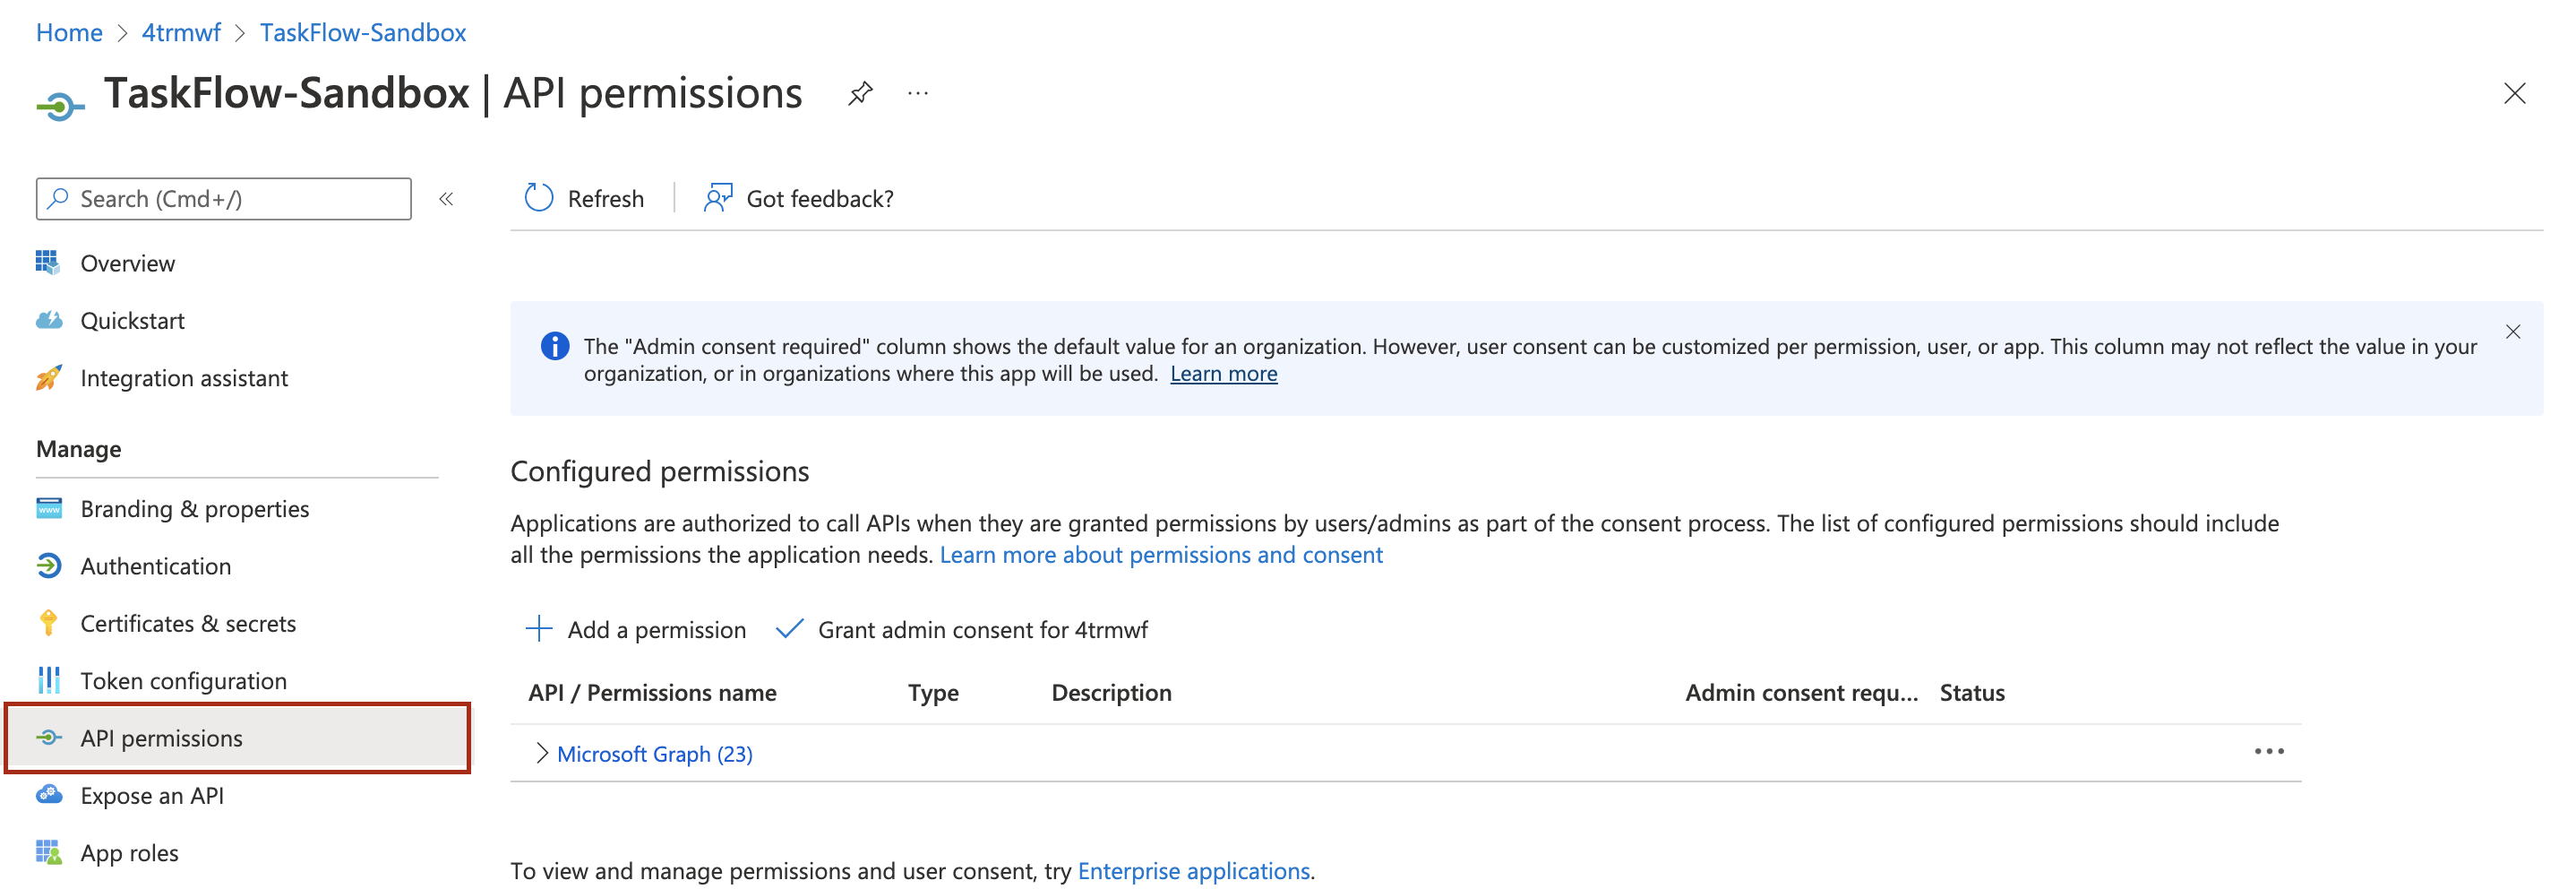
The next step is to provide the newly registered application with certain API Permissions. TaskSuite will need permission to maintain access to data you have given it access to as well as read and write access to mailboxes via IMAP. This can be done by navigating to the “API Permissions” tab as seen in the screenshot below:
The main access rights you would need to grant are delegated access rights and are listed below:
Mail.ReadWrite
offline_access
openid
If you have correctly set up your permissions you should see a list as seen in the screenshot below:
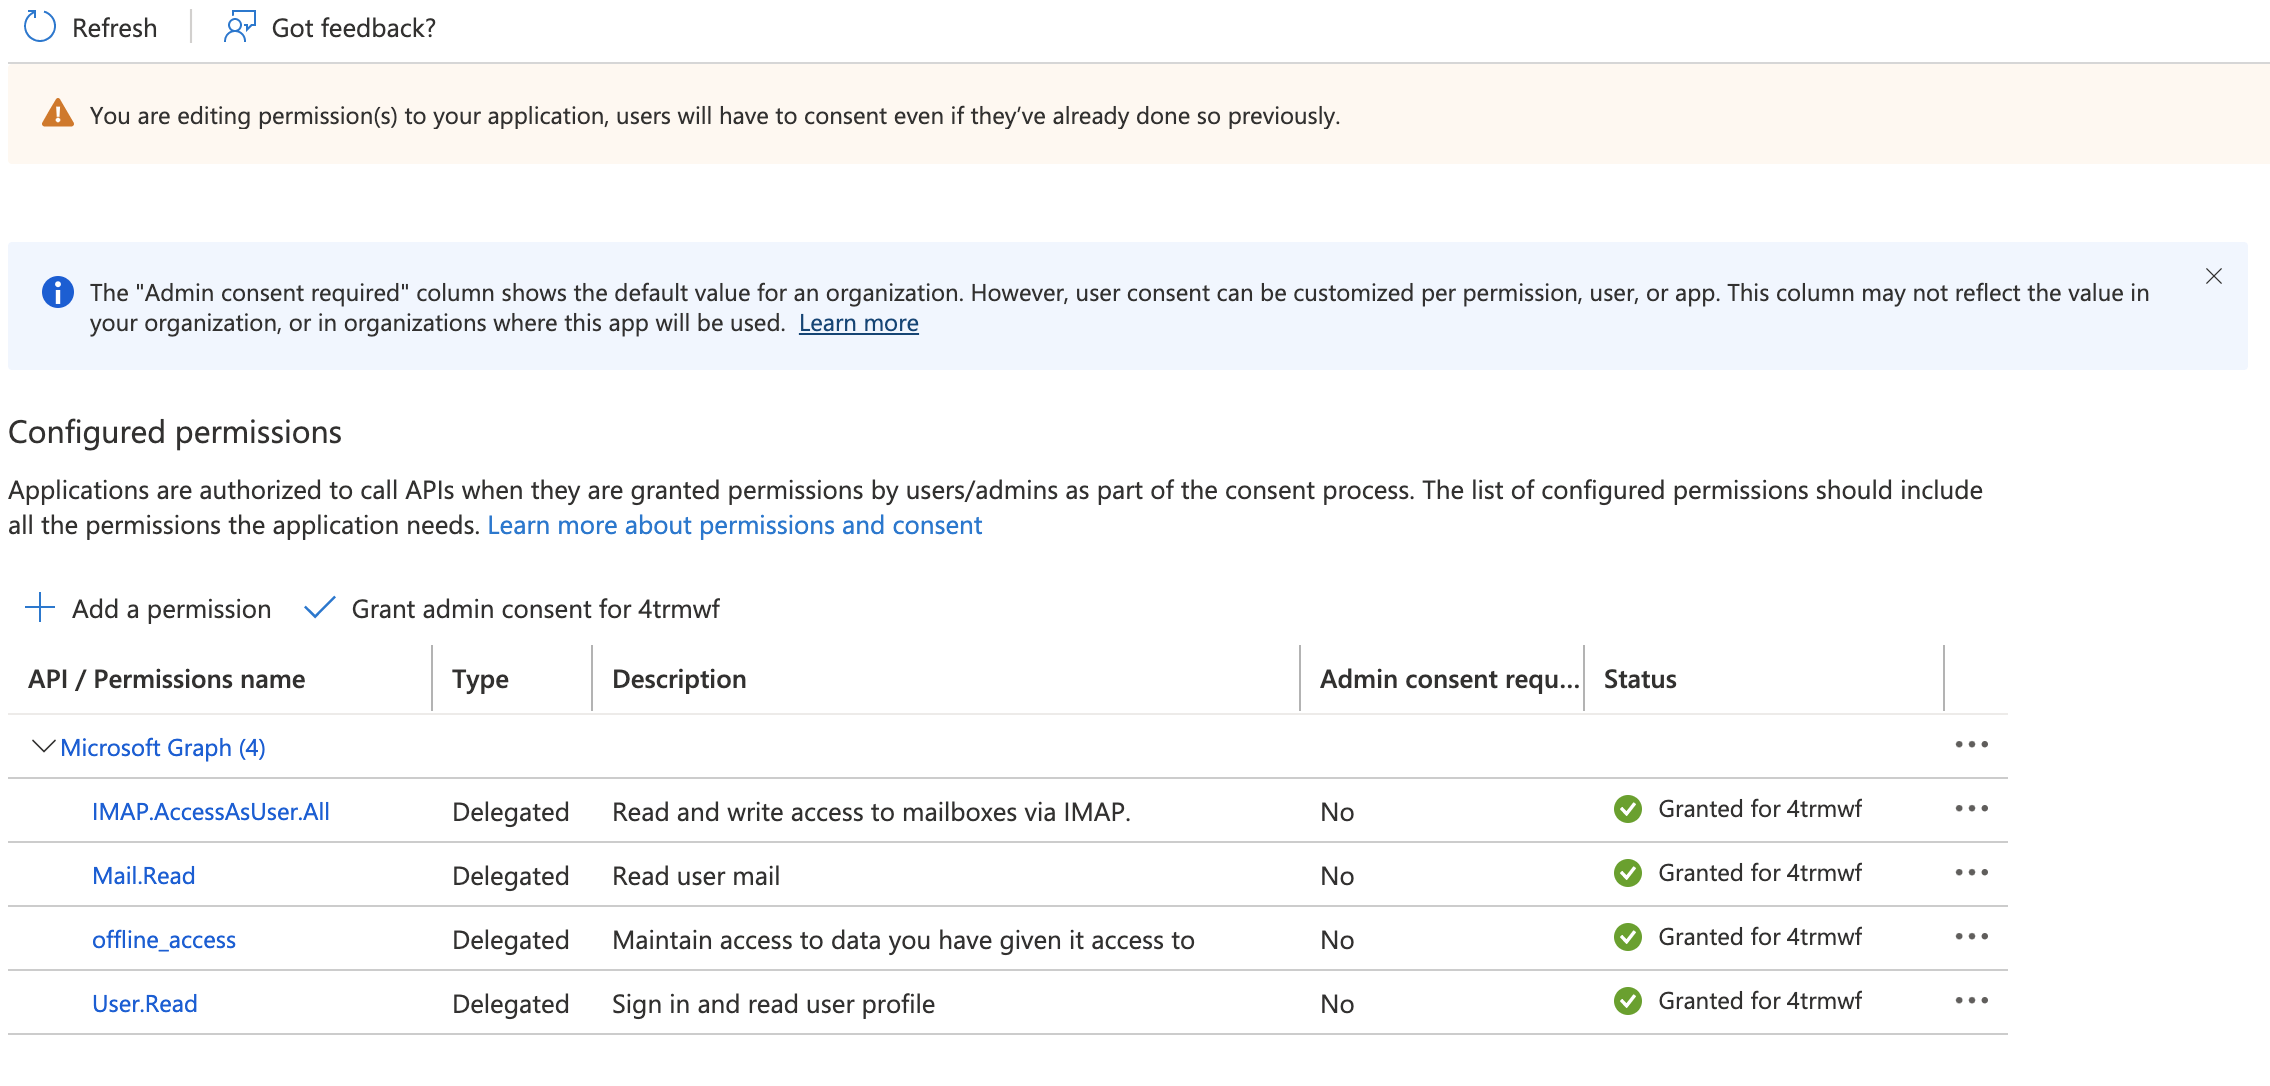
You can also click on the “Grant Admin consent for …” option to immediately grant the TaskSuite application access to the permissions listed above.
This temporarily concludes the Azure Portal part of the set up. The last step will be to enter the redirect URI once you have created the inbound mail server on TaskSuite.
Step 4: Set up a redirect URI (return to this step after setting up TaskSuite Inbound Mail Server)
The redirect URI is used by Microsoft to communicate information such as the access token back to the TaskSuite system.
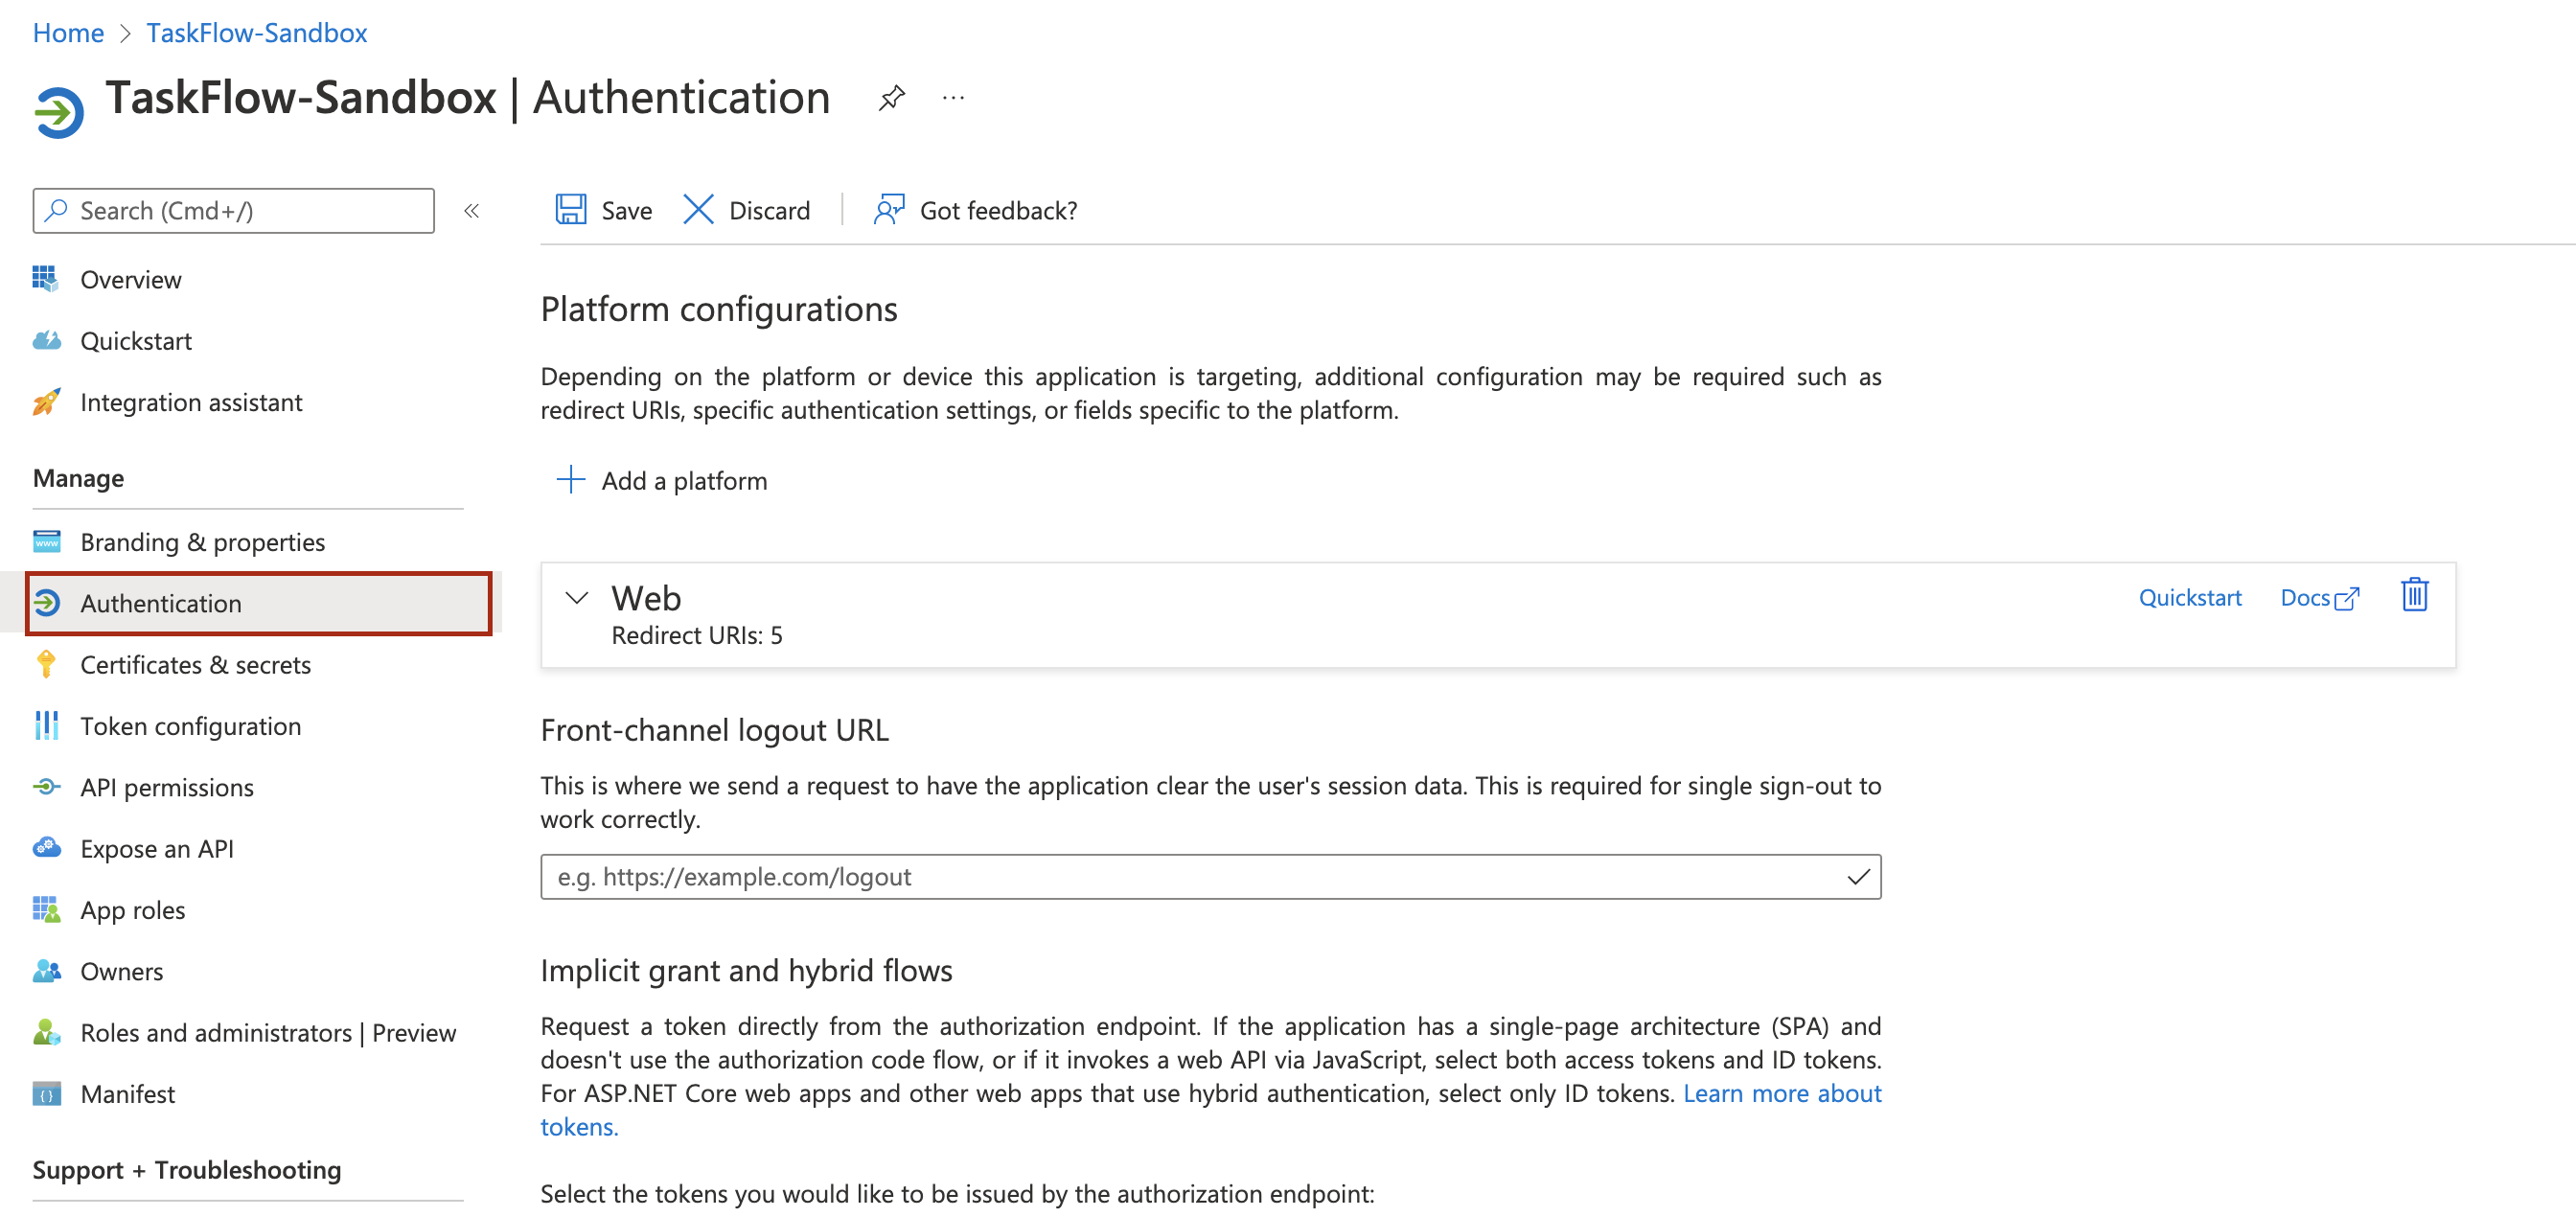
Navigate to the “Authentication” tab in the Azure portal as seen in the screenshot below:
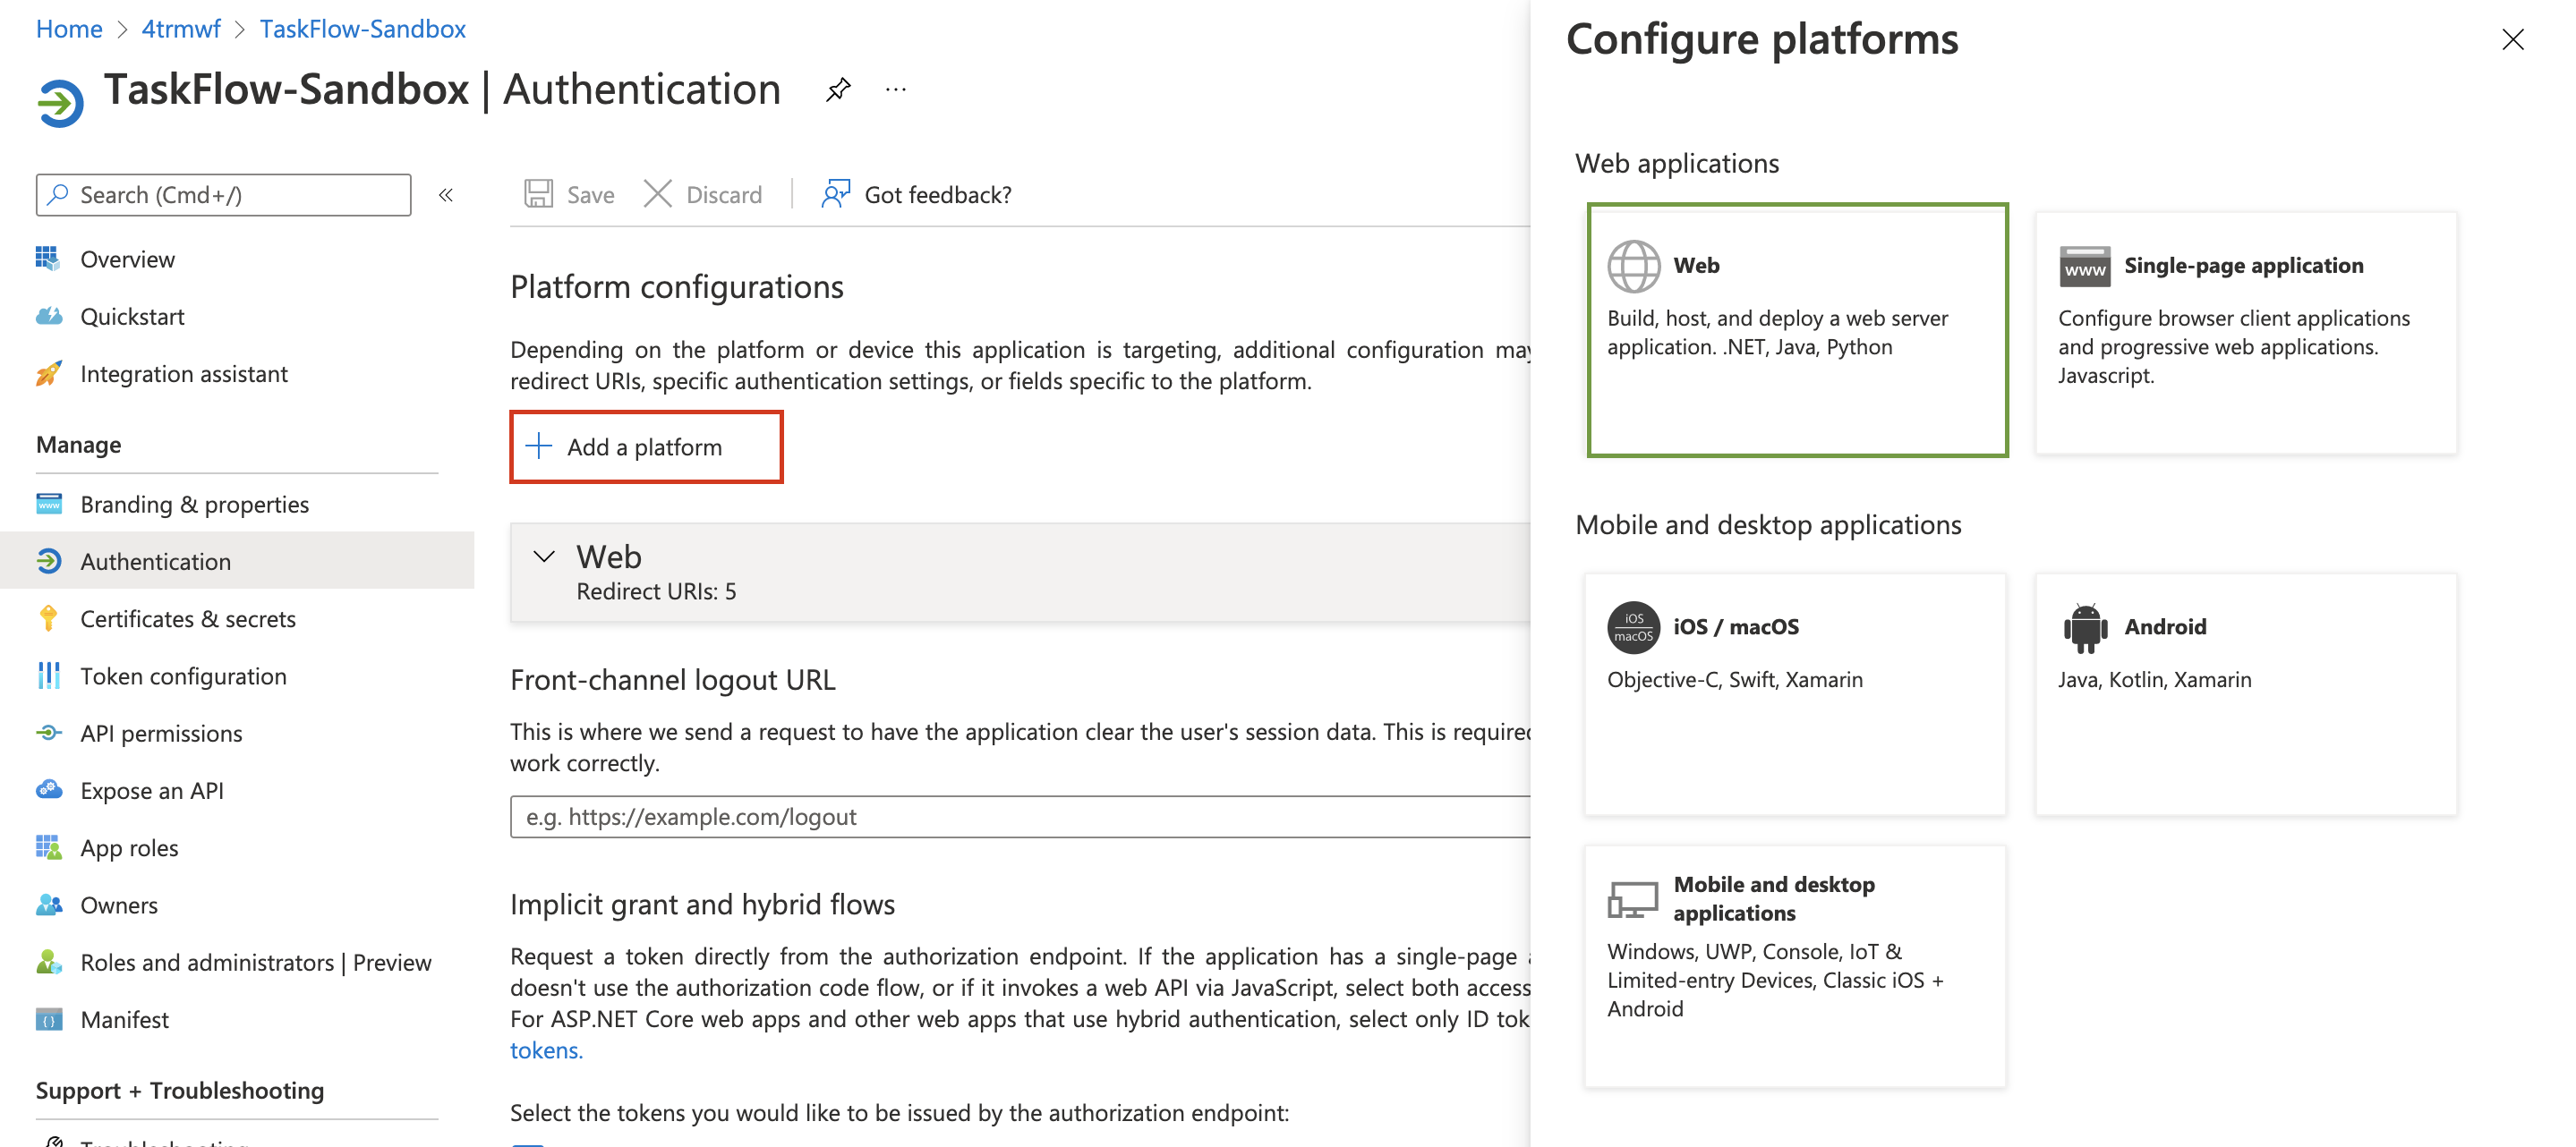
Click on the “Add a Platform” button (highlighted by the red box in the screenshot below) and select the “Web” option (highlighted by the green box in the screenshot below). Paste the Redirect URL that you’ve copied from the TaskSuite account set up and click on the “Configure” bottom on the bottom of the panel. Once you are happy with the set up you can click “Save” and return to Step 4 of the TaskSuite Inbound Mail Server Set-up.
TaskSuite Inbound Mail Server Set-up
The setup process of the TaskSuite mail server involves entering the data obtained from the Azure portal and validating the information. If the information is valid, TaskSuite will automatically handle tokenisation from there on out. The only other manual process would be to change the password once it has expired on the Azure portal. The expiration date is however configured by you and is to be used at your own discretion.
Step 1: Navigate to the Inbound Email configuration
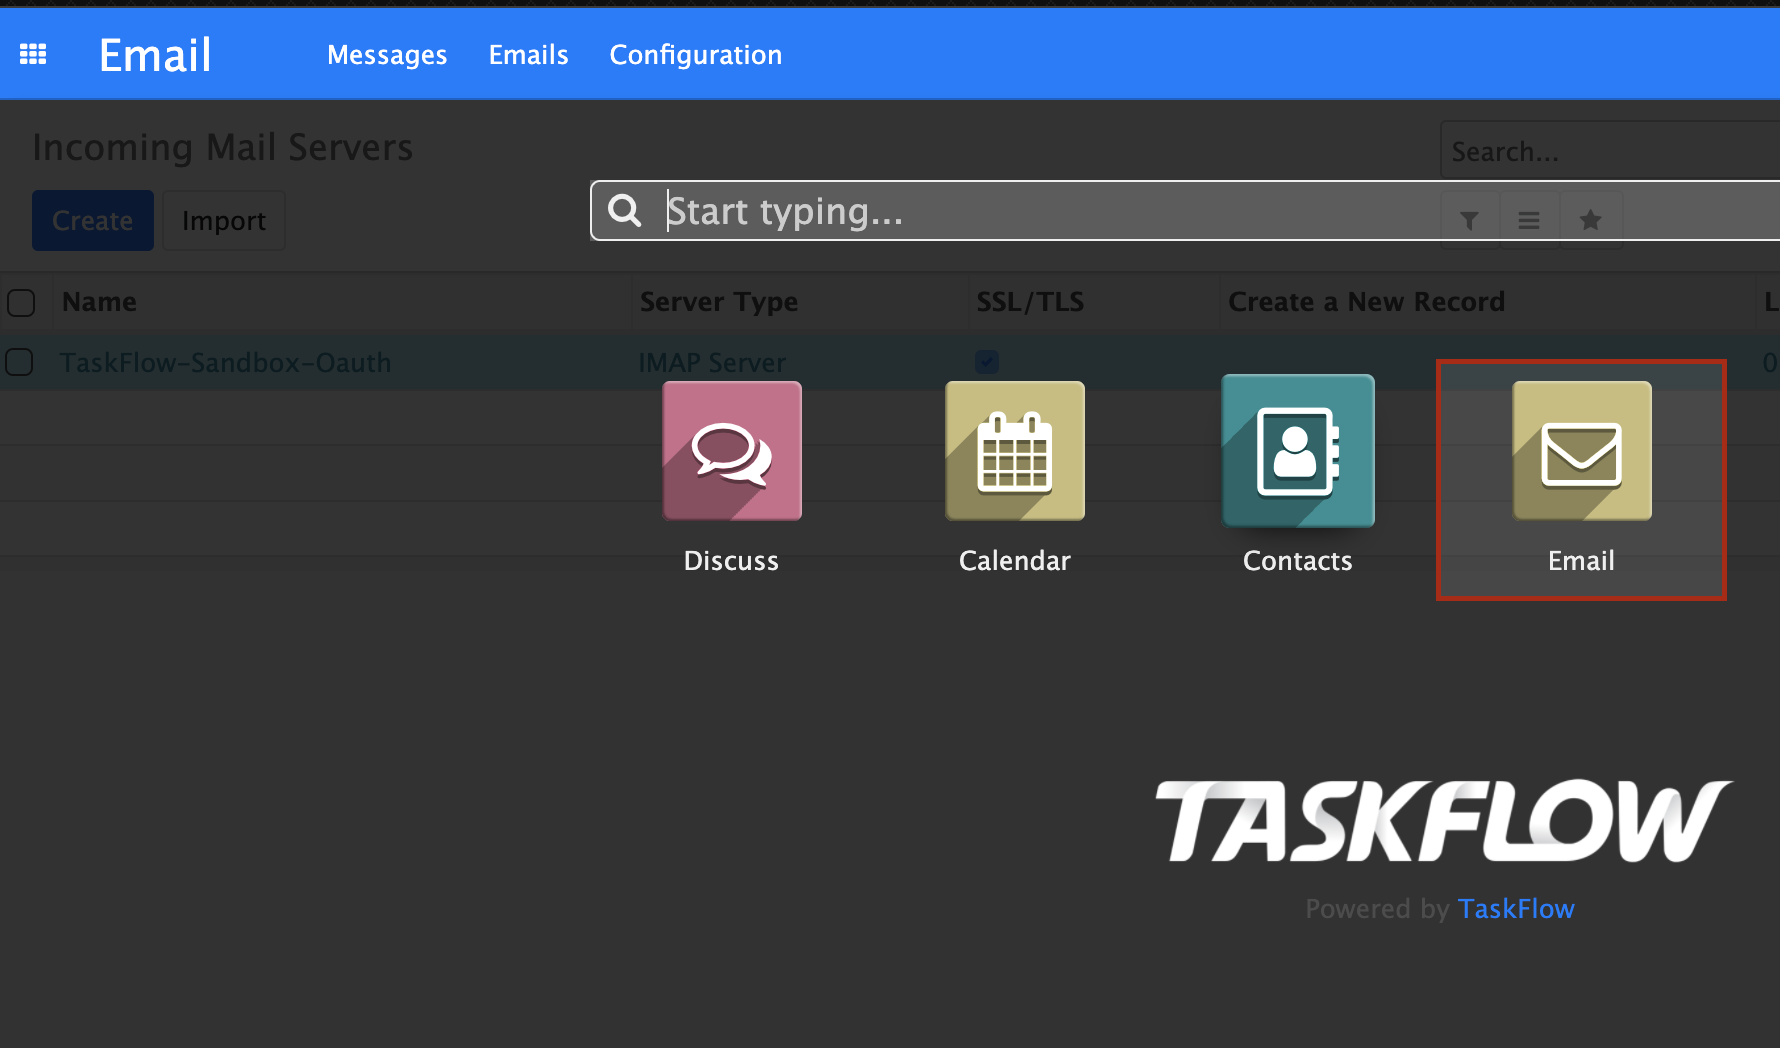
Navigate to the inbound email server set up by clicking on the Email option in the app switcher as seen on the screenshot below:
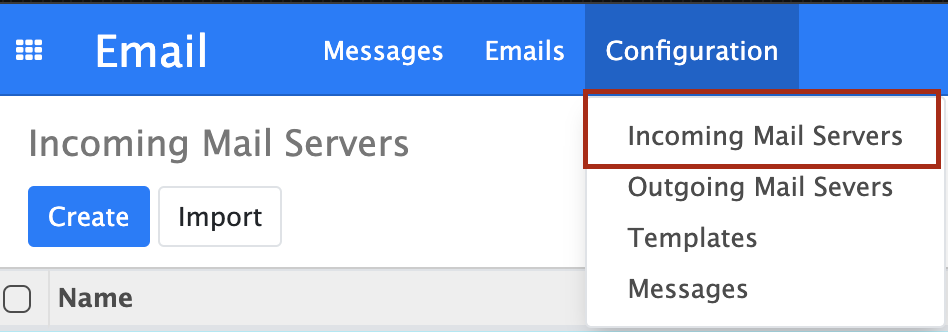
Once the email app has loaded, navigate to the configuration tree view by clicking on Configuration → Incoming Mail servers.
Step 2: Create a new Incoming Mail Server
To create a new Incoming Mail Server click on the “Create” button. You will then be presented with a form view that will allow you to enter the relevant information. Below is a description of the fields required for the OAuth2.0 Microsoft server along with an image of the form view of the Inbound Mail Server set up.
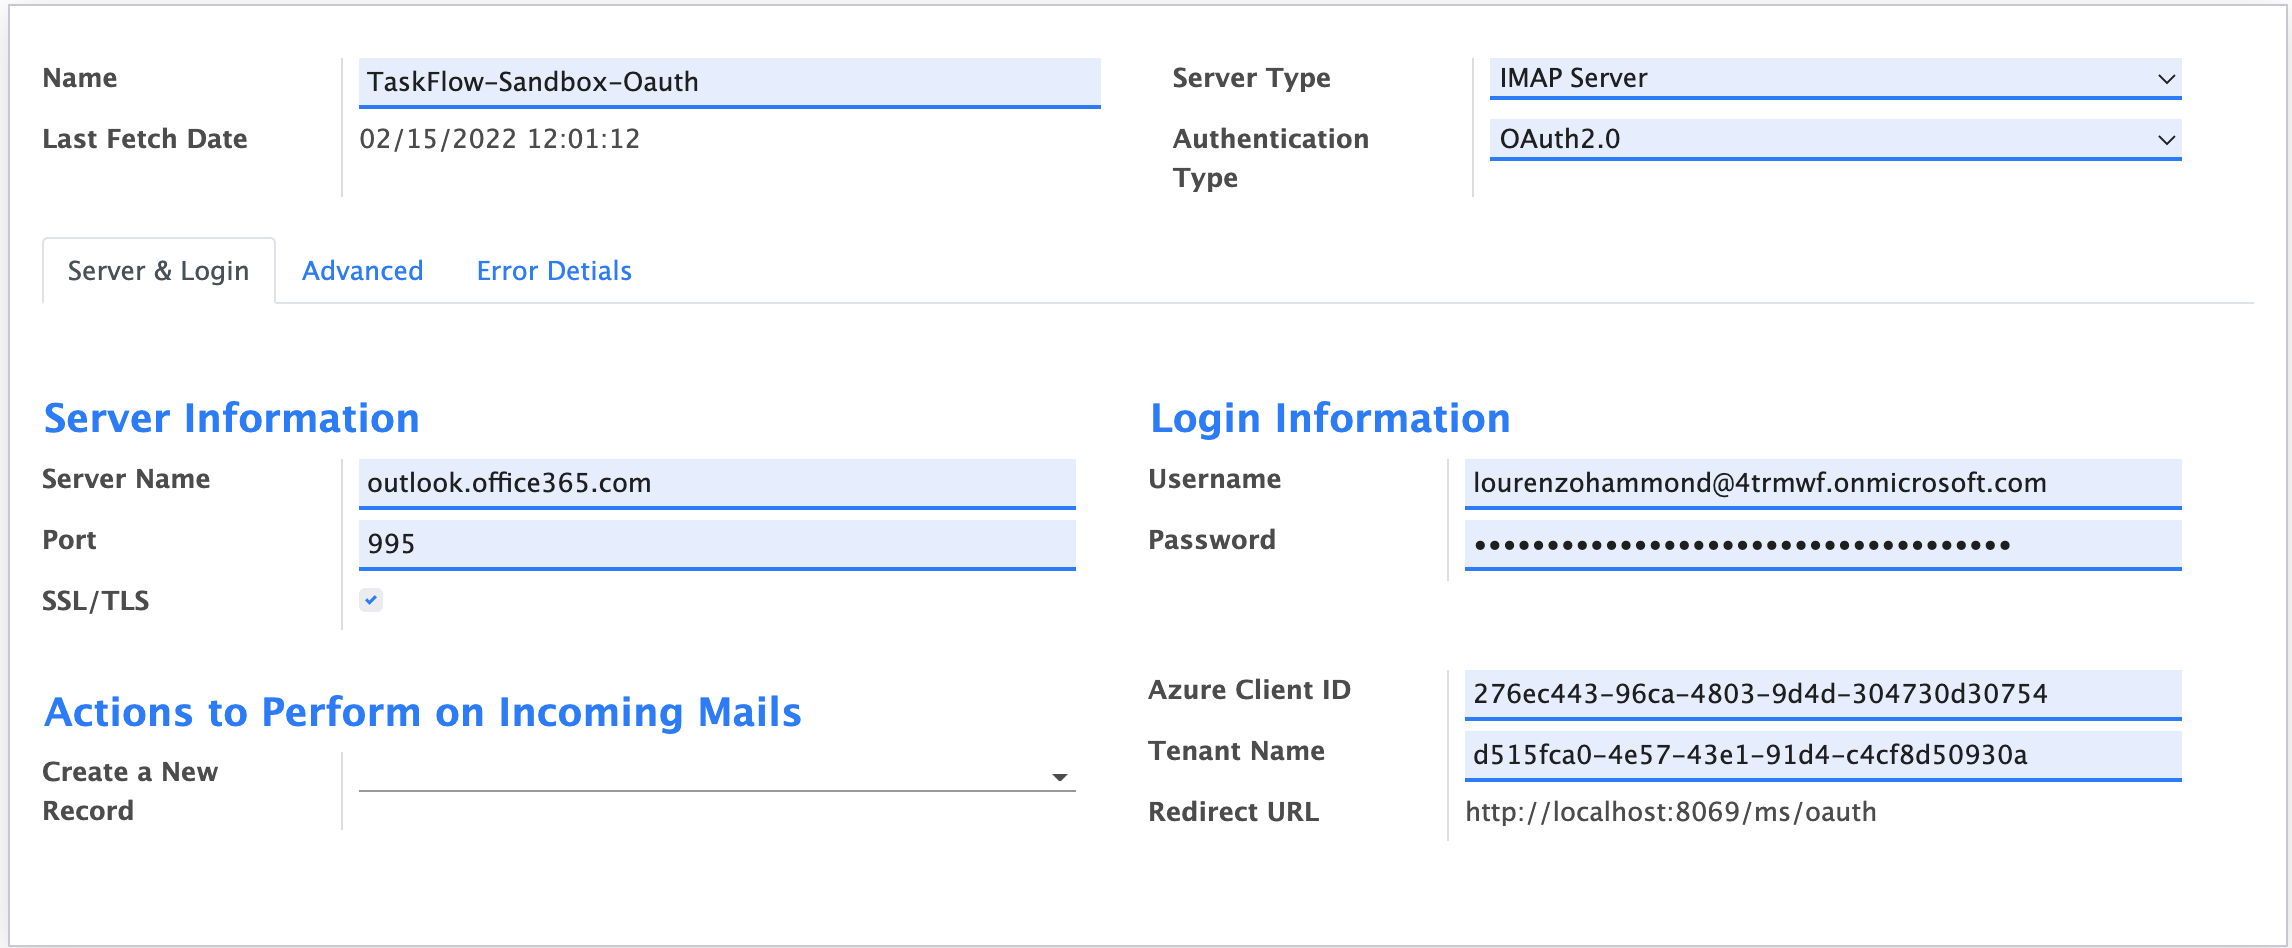
Name (required): The name you wish to give to the email server linked to TaskSuite
Server Type (required): The type of email server you are setting up. (IMAP only, for now)
Authentication (required): Set this to OAuth2.0, the default is Basic Auth.
Server Name (required): The domain/IP address of the exchange server.
Port (required): The port that will be used to transport authentication/connection/emails from the server.
SSL/TLS: This will automatically be set to true when selecting OAuth2.0 as your authentication type since all communication must occur over a secure connection. If this is not set to “True” please do so.
Username (required): The email address of the inbox that you are going to be using.
Secret (required): This will be the secret “Value” that you created during the Azure portal set up (Step 2)
Azure Client ID (required): This is the “Application (client) ID” that you obtained during the Azure portal set up.
Tenant Name (required): This is the “Directory (tenant) ID” that you obtained during the Azure portal set up.
Step 3: Save the details and Copy the Redirect URL to Azure
Once you are happy with the information you have entered you can click on the “Save” button located near the top left corner of the TaskSuite application.
Take note of the Redirect URL located at the bottom right corner of the form view.
You will need to copy this URL and link it as a Redirect URI in the Azure Portal. (See Step 4 of Azure Portal Set up)
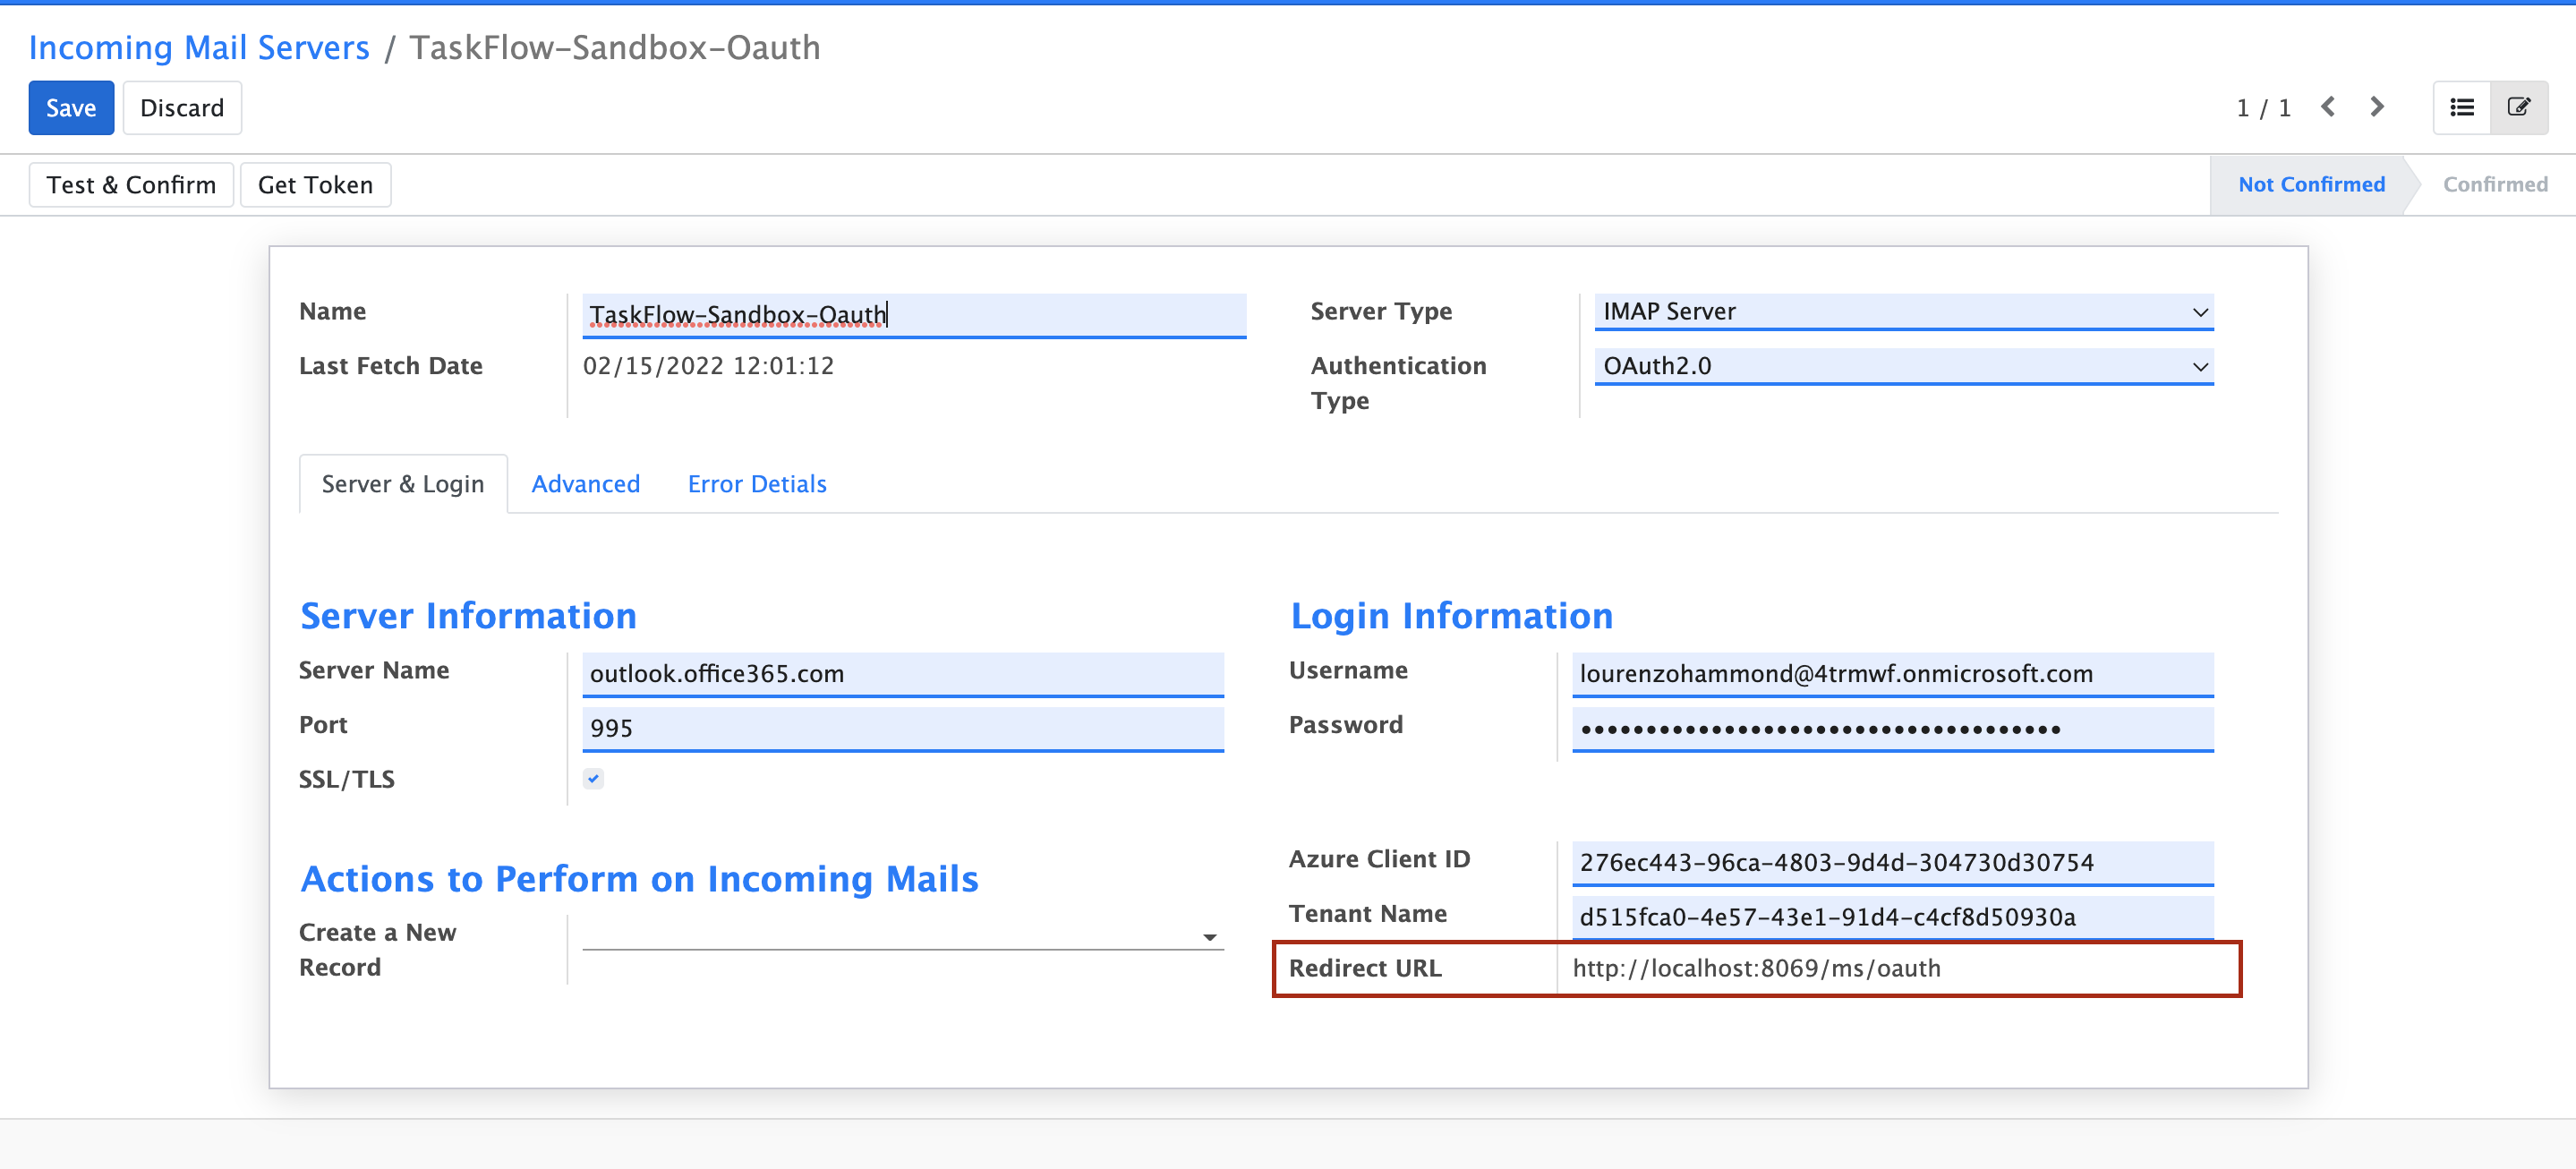
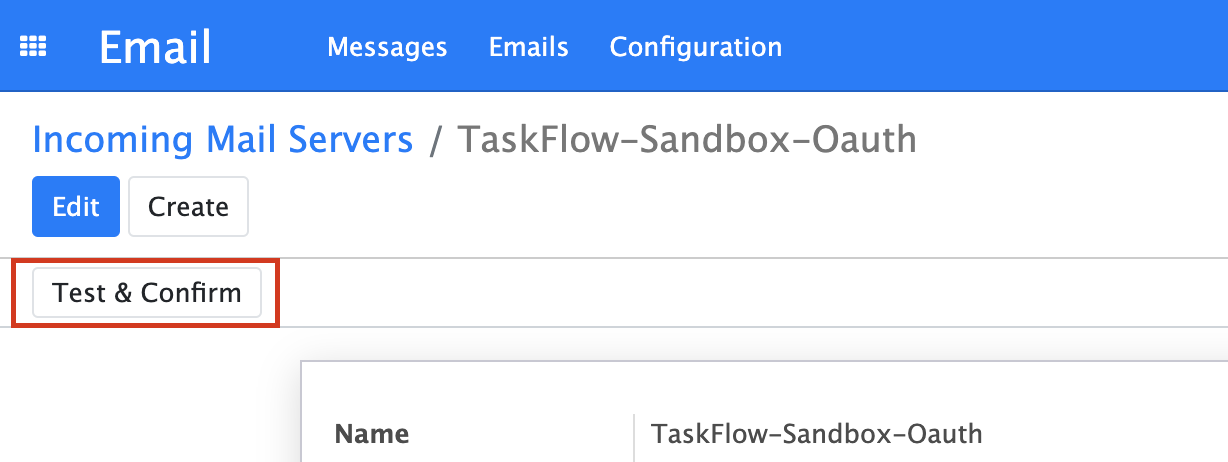
Step 4: Test and Confirm the details
Once you have completed all the steps in the Azure Portal Set Up, double check the details entered on the TaskSuite system and save the data. You can then test the account’s connection by clicking on the “Test & Confirm” button as seen in the screenshot below:
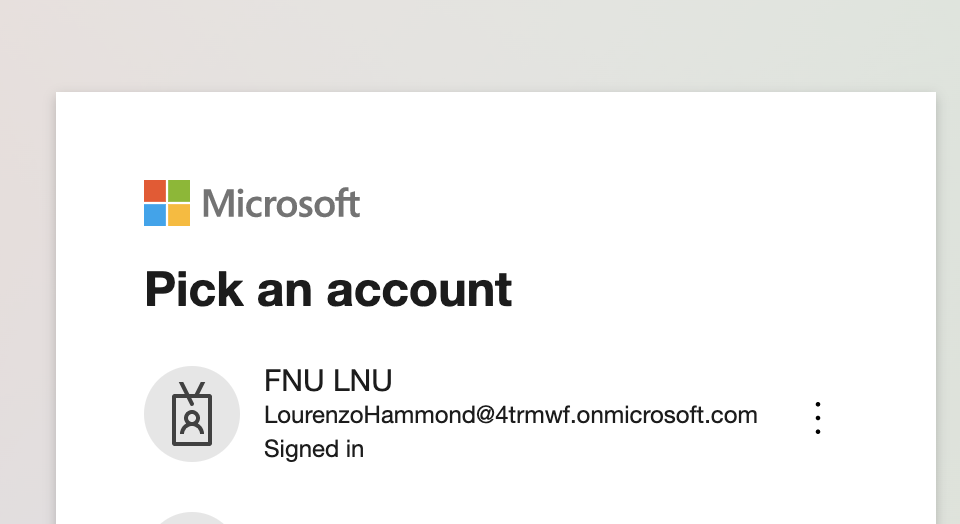
This will re-route you to to the Microsoft platform to log in to your Microsoft email box as seen below. Please ensure that you use the same email address that you specified on the TaskSuite Incoming Mail Server Set-up and the standard password for your email box (NOT the secret that you have created).
If you have logged in successfully you will be redirected to the TaskSuite system where you will be requested to log in again. Once you have logged in you will immediately be presented with the Inbound Mail Server that you have just set up. If all went well your will noticed that state of the Inbound Mail Server will be set to “Confirmed” as seen in the screenshot attached.
Important Notes:
Please ensure that the email address being used has a valid Office 365 license and has access to an Outlook inbox.
For any queries regarding the set up, please contact support@taskflow.co.za or support@tasksuite.com